

The Beginner's Guide to Regenerative Potato Growing
Last Updated: October 25, 2026
Quick Summary
Regenerative potato growing builds soil fertility and resilience through reduced tillage, cover crops, diverse rotation, organic matter accumulation, and adaptive pest management. This interconnected system produces higher-quality potatoes while requiring less external input over time, though expect a modest 10-20% yield dip in the first one to two seasons as soil biology rebuilds.
Start with a soil test through your state cooperative extension office to establish a baseline for pH, organic matter, and nutrient levels.
Choose from three no-till systems: surface-planted straw mulch for small plots, permanent beds with shallow tillage for easier transition, or strip-till for field-scale yields.
Plant cover crops immediately after harvest in late summer or early fall, rotating species yearly to prevent pest buildup and strengthen soil resilience.
Scout weekly for Colorado potato beetle egg clusters on leaf undersides and remove by hand before larvae hatch.
Measure success with four indicators: soil organic matter, infiltration rate, compaction depth, and yield per bed, tracked annually against a tilled control bed.
Table of Contents
What Regenerative Agriculture Means for Potato Growing
Building Soil Health and Soil Structure for Potatoes
No-Till Potato Growing Without Sacrificing Yield
Using Cover Crops for Potatoes to Restore Fertility
How to Grow Potatoes in Pots with Regenerative Methods
Organic Potato Pest Management and Disease Prevention
Starting Your First Regenerative Potato Season
Frequently Asked Questions
What Regenerative Agriculture Means for Potato Growing
Regenerative agriculture is a farming philosophy centered on restoring soil health rather than simply sustaining it. For potato growers, this means treating soil as a living system that improves each season.
The core principle is simple: healthy soil produces healthy potatoes.
Regenerative agriculture for potatoes rests on five interconnected practices: reduced or no-till disturbance, cover crops, diverse rotation, organic matter accumulation, and adaptive pest management. They work together: eliminating tillage preserves soil structure and microbial networks, cover crops rebuild nitrogen and organic matter, and rotation breaks pest cycles naturally. The result is a self-reinforcing system requiring less external input over time.
The transition demands upfront planning and patience, but the payoff is significant: regenerative potato growing methods produce higher-quality seed and table potatoes while building the foundation for long-term productivity.
Building Soil Health and Soil Structure for Potatoes
Soil structure, the arrangement of soil particles into stable aggregates, is the foundation of regenerative potato production.

Start by testing your soil.
Organic matter is your primary tool. Every season, add compost, aged manure, or leaf mold to the top 2-4 inches.
Avoid annual deep tillage, which destroys structure and releases stored carbon.
No-Till Potato Growing Without Sacrificing Yield
Won't skipping tillage reduce yields? Yield depends less on whether you till and more on whether you solve three potato-specific problems: seed-to-soil contact, tuber expansion room, and harvestability.
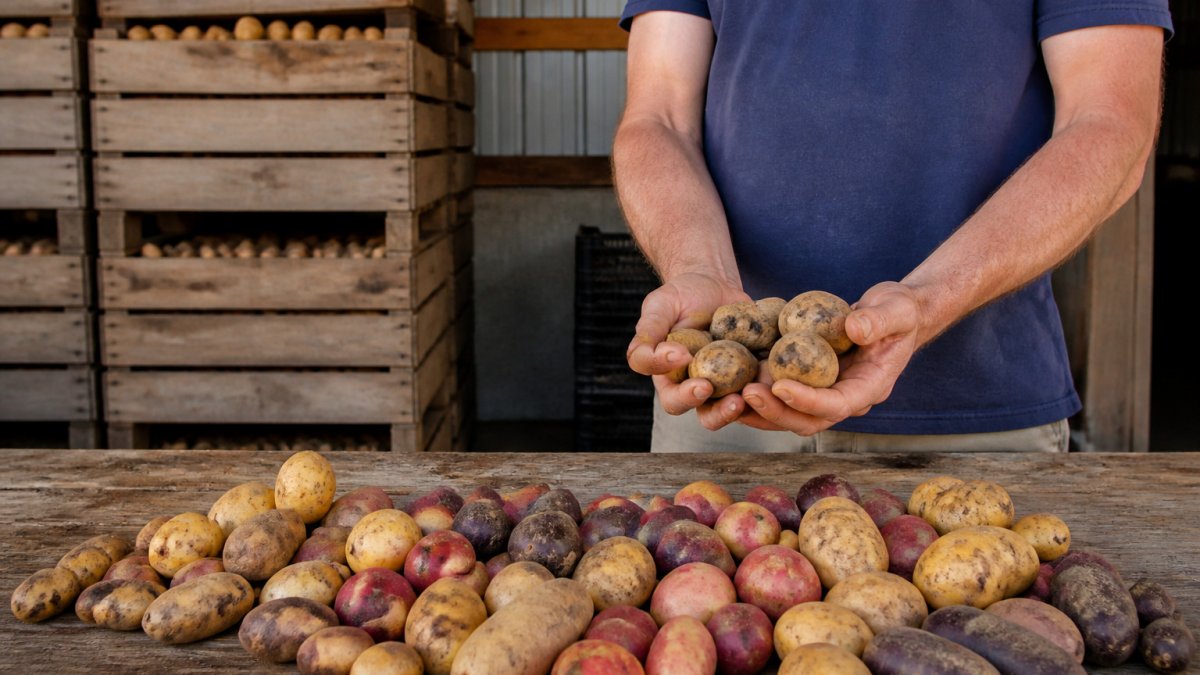
Washington Grown
The three no-till potato systems, ranked by risk:
Surface-planted straw mulch (lowest equipment cost, highest mulch dependence). Clear weeds, spread 2-3 inches of finished compost, lay seed pieces on the surface 8-12 inches apart in-row and 30-36 inches between rows, then cover with 6-8 inches of clean straw, shredded leaves, or hay. Add mulch as stolons run. At harvest, pull back mulch and lift tubers by hand. Works best on small plots and in humid climates where mulch stays put; fails in windy, dry regions where mulch blows or dries out.
Permanent beds with shallow surface tillage (moderate risk). Keep beds untrafficked and loosen only the top 2-3 inches with a broadfork or power harrow before planting. Seed pieces go 3-4 inches deep, then you hill with compost or mulch rather than soil. This preserves deeper structure and earthworm channels while giving tubers a loose zone. Most practitioners find this the easiest transition from conventional beds because planting depth and spacing stay familiar.
Strip-till or zone-till (highest equipment cost, closest to conventional yields). Disturb only a 4-6 inch band where seed goes, leaving inter-row soil and residue intact. This is the system most likely to match conventional yields on a field scale because it warms and dries the seed zone in spring, critical for potatoes, which rot in cold, wet soil. The trade-off is machinery cost and the need to manage residue so it doesn't smother emerging plants.
The yield trade-off, stated plainly: In the first one to two seasons, expect a modest yield dip, commonly 10-20% on heavier soils, as soil biology and aggregation rebuild. By seasons three to five, most growers report yields converging with or exceeding their previous conventional plots, largely because water infiltration and disease pressure improve. Do not promise yourself a first-year record; budget for it.
Harvestability is the hidden constraint. Potatoes set tubers in the top 6-8 inches, so no-till works only if that zone stays loose. Compacted clay without mulch or a shallow loosening pass will produce small, misshapen tubers and a miserable harvest. Test by pushing a finger or a soil probe into the planting zone after rain, if it resists, loosen before planting.
Equipment reality check: You do not need a no-till drill to start. A broadfork, a sturdy rake, and a reliable mulch source cover the surface-mulch system. Zone-till requires a strip-till rig or a modified row cultivator, which is a field-scale investment.
Watch Out Green tubers are toxic. Any tuber exposed to sunlight turns green and should not be eaten. In no-till systems, re-cover exposed tubers immediately after hilling or wind events, mulch depth is your only protection.
Key Takeaway No-till potatoes succeed when you solve seed-to-soil contact, tuber expansion room, and harvestability, not when you simply stop tilling. Start with surface mulch on a small plot, measure yield against a tilled control bed, and expand only after two seasons of data.
Three no-till systems offer different trade-offs between equipment cost, complexity, and yield risk.
System | Equipment Cost | Yield Risk | Best For |
Surface-planted straw mulch | Lowest | Highest | Small plots, humid climates |
Permanent beds with shallow tillage | Moderate | Moderate | Transition from conventional beds |
Strip-till or zone-till | Highest | Lowest | Field-scale, conventional yield matching |
Using Cover Crops for Potatoes to Restore Fertility
Cover crops are non-harvested plants grown to improve soil fertility, structure, and pest management, the engine that rebuilds nitrogen and organic matter between cash crops.
The best strategy depends on your climate and growing season.
Termination timing matters. Legumes should be turned under or flattened when they're flowering but before seed set, this maximizes nitrogen release.
A common mistake is planting the same cover crop year after year.
How to Grow Potatoes in Pots with Regenerative Methods
Container growing offers flexibility for small-space gardeners and full control over soil inputs. The regenerative approach emphasizes quality soil mix and minimal disturbance, just like in-ground growing.
Start with a container at least 12 inches deep and 18 inches wide, larger is better for tuber expansion and moisture buffering.
Place seed pieces on the surface and cover with 3-4 inches of the same mix. As plants grow, add more mix every 2-3 weeks, mounding around stems, this "hilling" encourages tuber formation along buried stems. By harvest, the container will be nearly full.
Water consistently, containers dry faster than ground beds, but avoid waterlogging. Mulch the surface with straw to reduce evaporation and keep tubers shaded.
Container growing excels for testing varieties and learning regenerative methods on a small scale before committing garden space. You can build a custom sampler to try multiple organic varieties before ordering full quantities.
Organic Potato Pest Management and Disease Prevention
Regenerative systems naturally suppress many pests and diseases because healthy soil supports beneficial microbes and strong plant immunity, but vigilance is still required.
The primary pests are Colorado potato beetles, aphids, and flea beetles. Second, encourage beneficial insects with flowering cover crops and perennial borders nearby; ladybugs, parasitic wasps, and ground beetles will patrol your patch if habitat is available.
For active infestations, hand-picking beetle larvae and using row covers on young plants provides effective, low-impact control.
Disease management focuses on prevention: certified pathogen-free seed eliminates many soil-borne diseases, adequate spacing and airflow reduce fungal pressure, and avoiding overhead watering limits late and early blight.
Starting Your First Regenerative Potato Season
Your first regenerative potato season sets the trajectory for years ahead. Here's a dated, measurable plan plus the monitoring framework to know whether it's working.
Season-by-season plan (adjust dates to your frost-free window):
8-12 weeks before last frost, Baseline and planning. Pull a soil test through your state cooperative extension office (typically $15-$40) for pH, organic matter, phosphorus, potassium, and cation exchange capacity. Map your beds and commit to a three-year rotation so no plot sees potatoes more than once every three years. Order certified pathogen-free seed potatoes now.
6-8 weeks before last frost, Cover crop termination and bed prep. If a fall cover crop is still standing, crimp, mow, or tarp it 2-3 weeks before planting so residue breaks down without tying up nitrogen. Add 2-3 inches of finished compost to beds you'll plant.
2-3 weeks after last frost, Planting. Plant when soil at 4 inches reaches 45°F. Seed pieces go 3-4 inches deep in tilled or zone-tilled beds, or on the surface under 6-8 inches of mulch in no-till beds. Space 8-12 inches in-row for fingerlings, 12-15 inches for larger varieties, with 30-36 inches between rows.
Monitoring: define success before you start. Pick three or four indicators and measure them the same way each year:
Soil organic matter via the same lab test each fall. A realistic first-year goal is to hold steady; gains of 0.1-0.3 percentage points per year are a strong result on most soils.
Infiltration with a simple ring or coffee-can test: time how long it takes 1 inch of water to soak in. Faster infiltration over seasons signals improved structure.
Compaction with a penetrometer or wire flag at 6 and 12 inches in the planting zone.
Realistic first-year economics. Expect first-year costs to exceed a conventional plot, with savings in later seasons as fertility and water retention improve.
Start small and measure. Learn which potato varieties work best for backyard gardens before selecting your seeds. One or two beds, or a handful of containers, is enough to learn the system. Keep a tilled control bed alongside your regenerative bed for the first two seasons, the side-by-side comparison is the most convincing evidence you'll have and shows exactly where methods need adjustment.
Pro Tip Photograph your beds from the same spot each month. Soil color, aggregation, and earthworm counts change slowly, photos make the progress visible when the season feels like a slog.
Key Takeaway A regenerative potato season is a measured experiment, not a leap of faith. Set a baseline, follow a dated plan, track four indicators, and compare against a control bed. Expand only after the data says your system is working.
Frequently Asked Questions
What does regenerative agriculture mean for growing potatoes?
Regenerative agriculture for potatoes focuses on building soil health and fertility rather than depleting it. Instead of relying on heavy tillage and synthetic inputs, regenerative potato growing uses cover crops, reduced tillage, crop rotation, and organic matter to restore soil structure and nutrient cycling. This approach produces healthier plants, stronger tubers, and improves long-term farm resilience while reducing dependence on external inputs.
Can I grow potatoes without tilling the soil?
Yes. No-till potato growing uses mulch layers (straw or hay), cover crops, and direct planting into undisturbed soil to reduce erosion and preserve soil structure. While no-till requires more careful seed piece preparation and mulch management than conventional tillage, home gardeners report successful harvests without compromising yield. The key is using adequate mulch depth (4-6 inches) to suppress weeds and protect developing tubers from sunlight.
How can cover crops improve soil for potato growing?
Cover crops like legumes (clover, vetch) add nitrogen to soil through natural fixation, while grasses and brassicas improve soil structure and suppress weeds and diseases. Plant cover crops in the off-season or rotate them between potato plantings. Terminate cover crops 2-3 weeks before planting potatoes by mowing, rolling, or shallow incorporation. This builds organic matter and reduces pest and disease pressure for your next potato crop.
What organic methods work best for managing potato pests and diseases?
Organic potato pest management combines cultural practices with targeted treatments. Rotate crops to break pest cycles, use certified pathogen-free seed pieces, maintain healthy soil to strengthen plant immunity, and practice sanitation by removing infected plant material. For active infestations, neem oil, spinosad, or sulfur dust address common pests and fungal issues. Adequate spacing, mulching, and irrigation management prevent many diseases before they start.
How do I know if my seed potatoes are truly pathogen-free?
Certified seed potatoes come from producers who follow strict testing and certification protocols to ensure freedom from viruses, bacteria, and fungi. Look for certifications from recognized seed potato programs that conduct regular field inspections and laboratory testing. Early generation seed (FY1 or single-drop) from certified growers offers the highest pathogen-free assurance. When purchasing from small producers, ask for documentation of their certification status and testing results.
Can I grow potatoes regeneratively in containers or small spaces?
Yes. Container potato growing works well with regenerative methods by using quality compost, mulch, and organic amendments instead of soil. Containers allow you to control soil composition entirely, eliminate tillage concerns, and manage pests more easily. Use 5-10 gallon containers with drainage, fill with composted organic matter, plant certified seed pieces, and mulch heavily. Container growing suits specialty and fingerling varieties perfectly for home gardeners with limited space.
Why does regenerative seed potato quality justify higher prices?
Premium regenerative seed potatoes reflect certified organic production, rigorous pathogen testing, hand-harvesting, and early-generation certification. These practices ensure superior germination rates, disease resistance, and plant vigor compared to later-generation or untested seed. For home gardeners, higher-quality seed means fewer crop failures, better harvests, and the ability to grow rare specialty varieties.
Transitioning to regenerative potato growing methods takes commitment, but it's an investment in your soil, your food, and your independence from industrial agriculture. The practices outlined here work because they align with how soil ecosystems actually function. Start with soil health, choose quality seed stock, and trust the system. Your potatoes, and your soil, will reward you.
PURCHASE SEED POTATOES
Add seed-potatoes.com as a preferred source on Google →
Comments