

Sustainable Potato Farming for Beginners: A Complete Guide
Quick Summary
Sustainable potato farming means building a loop where healthy soil holds moisture, healthy plants resist pests, and you measure what you use. Start with certified seed, loose well-drained soil enriched with compost, steady deep watering with mulch, and prevention-first pest control.
Start with certified seed potatoes rather than grocery-store potatoes, which are often treated to stop sprouting.
Build fertility with compost, aged manure and leaf mold, and test soil pH before planting.
Water deeply and consistently, aiming for roughly one to two inches per week including rainfall.
Hand-pick Colorado potato beetles early and consistently, before populations build up.
Keep a log of seed, water, and harvest weights to compare varieties and methods across seasons.
Table of Contents
What Sustainable Potato Farming Means for a Home Grower
Last Updated: November 8, 2026
Sustainable potato farming for beginners is less about a single technique and more about a set of choices that keep your soil productive, your water use reasonable and your plants healthy season after season. At Soda Springs Solar Gardens LLC, we grow seed potatoes on a small, family-run operation, and we think the home grower can run a sustainable plot with the same principles. The core idea is simple: feed the soil, protect the plants with cultural practices before reaching for inputs, and measure what you use.
A common mistake is treating sustainability as a list of products to buy. In practice it is a loop. Healthy soil holds moisture, which reduces watering. Healthy plants resist pests, which reduces intervention. Each season you learn what your plot needs, and the next season costs less in water, amendments and frustration.
Potatoes suit this approach well because they are a heavy feeder that also rewards careful preparation. A single seed piece can produce a surprising number of tubers, so the soil you build now feeds the crop you harvest later.
Choosing Seed Potatoes and Varieties for Your Plot
Seed quality decides more of your outcome than almost anything else. Start with certified seed potatoes rather than grocery-store potatoes, which are often treated to stop sprouting.
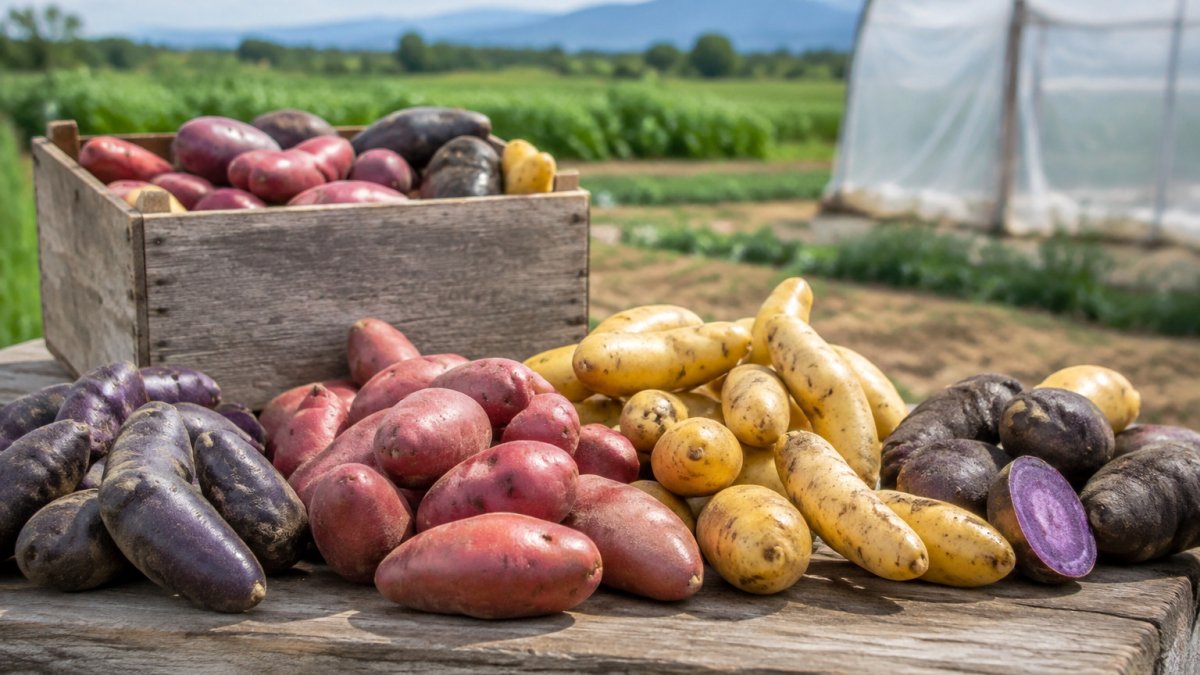
For a first season, buy a small quantity of several varieties rather than a large order of one. Our University of Maine Cooperative Extension potato variety guidance recommends trialing varieties suited to your region and intended use, whether that is storage, boiling or baking. Specialty fingerling and colored varieties add interest, but expect them to behave differently from common russets.
If you only want two or three pounds of seed for a backyard plot, a small sampler lets you test several types without committing to a large order. You can also start with minitubers, which give you a clean starting stock in small quantities. For a plain introduction to tuber size and spacing, our single drop seed potatoes guide walks through the basics, and our backyard variety comparison helps narrow the choice.
Preparing Loose, Well-Drained Soil and Building Fertility Over Seasons
Potatoes need loose, well-drained soil that lets tubers expand without resistance. Heavy clay that stays waterlogged invites rot, while sandy soil dries out quickly and needs more frequent watering. Aim for a soil that crumbles when squeezed and drains within a few hours after heavy rain.
Build fertility with organic matter rather than a single heavy fertilizer dose. Compost, aged manure and leaf mold improve structure and the soil's capacity to hold water. Work them in before planting, and top-dress again mid-season if the plants look pale. Over several seasons, this steadily raises the organic matter in the bed and reduces the amount you need to add each year.
A simple habit helps here: test your soil pH before planting. Potatoes perform best in slightly acidic soil, and a cheap test kit or your local extension service can tell you whether lime or sulfur adjustments are worth making. Rocks should be cleared, since they block tuber development and produce misshapen potatoes.
Planting Potatoes in the Ground, in Containers and in Bags
Plant after the last frost, when the soil has warmed and the danger of a hard freeze has passed. Pre-sprout seed potatoes indoors in bright, cool light so the eyes develop short, sturdy sprouts. Cut larger tubers into pieces with at least one or two eyes each, and let the cut surfaces dry for a day before planting.

Dig trenches about four inches deep and space seed pieces roughly twelve inches apart in rows about three feet apart. Cover them with soil and water in. The same basic logic applies whether you plant in the ground, in a container or in a bag.
How to Grow Potatoes in a Container
Containers suit a patio or a yard with poor soil. Choose a pot at least 15 to 20 gallons, with drainage holes in the base. Fill it with a light, loose potting mix to about four inches deep, set two or three sprouted seed pieces on top, and cover them with another two to three inches of mix. As the stems grow, keep adding mix until the container is nearly full, which encourages more tubers along the buried stem.
Container soil dries faster than ground soil, so check moisture daily in hot weather. Water deeply when the top inch feels dry.
Planting Potatoes in Bags
Fabric grow bags are an easy way to start, and they hold heat and drain well. Use a bag sized for the number of plants you want, fill it partway with compost-rich mix, plant the seed pieces, and add soil as the plants grow. Bags are easy to move into the sun and easy to empty at harvest, which makes checking for tubers simple.
The article gives these planting specifications for ground, container and bag growing.
Method | Key spec | Note |
In the ground | Trench about four inches deep | Seed pieces about twelve inches apart |
In the ground | Rows about three feet apart | Cover seed pieces and water in |
Container | Pot at least 15 to 20 gallons | Needs drainage holes in the base |
Container | Two or three sprouted pieces | Add mix as stems grow |
Grow bag | Filled partway with compost-rich mix | Add soil as plants grow |
Watering Efficiently and Hilling or Mulching Your Plants
Potatoes need steady moisture, especially from the moment tubers begin to swell until a couple of weeks before harvest. Irregular watering is the usual cause of knobby tubers, hollow heart and cracking, so the goal is consistent moisture at root depth rather than a light daily sprinkle.
For a beginner, the practical question is how much and how often. A common pattern is roughly one to two inches of water per week, including rainfall, delivered in one or two deep soakings rather than several shallow ones.
This is where sustainability becomes measurable. A rain gauge costs little and tells you how much of that weekly total the sky already provided, so you can skip irrigation after a real rain.
Mulch is the other half of the water plan. A deep layer of straw or leaves keeps soil cool, slows evaporation and suppresses weeds, and it adds organic matter as it breaks down. In a dry season, mulch can noticeably reduce how often you need to irrigate.
Hilling is the practice of drawing soil or mulch up around the stems as they grow. It protects developing tubers from light, since exposed tubers turn green and bitter, and it gives the plant more buried stem along which tubers can form.
Plan for drought before it arrives. If your area regularly goes weeks without rain, choose a bed with afternoon shade or grow in containers you can move, and lean on mulch and drip rather than hand-watering.
Low-Input Pest and Disease Prevention Without Synthetic Pesticides
Most potato problems are preventable with good cultural practice, and the sustainable approach is to build prevention into the season rather than react to symptoms. Think of it as a loop: prevent what you can, monitor what shows up, decide whether action is warranted, and choose the least disruptive control first.
Prevention starts with clean seed, since disease carried on the tuber is the hardest to fix later. Rotate your potato bed each year so soil-borne problems do not build up, and avoid planting potatoes where tomatoes, peppers or eggplant grew recently, because they share diseases.
Monitoring is the step beginners skip. Colorado potato beetles are the classic potato pest: adults are striped, and their orange larvae feed in clusters (Colorado Potato Beetle - Home and Garden IPM from Cooperative Extension).
Thresholds matter because not every insect justifies a response. This is the core of integrated pest management, and the USDA National Institute of Food and Agriculture integrated pest management resources explains how prevention, monitoring and thresholds fit together.
When action is needed, choose the least disruptive control first. Row cover fabric laid over plants early in the season excludes beetles and aphids without chemicals, though it must come off when plants flower if you want pollination. Encourage beneficial insects by planting flowers nearby and avoiding broad-spectrum sprays.
Potato scab, which roughens tuber skin, is less likely in acidic soil and when the soil stays evenly moist during tuber formation, so the watering and pH habits from earlier in this guide double as disease prevention.
Measuring Yield and Resource Use, Then Planning Your Next Season
Sustainability is easier to sustain when you measure it. Keep a simple log: variety, planting date, pounds of seed used, water applied, pounds harvested and any problems you noticed. Divide harvest weight by seed weight to get a rough yield ratio, and compare varieties and methods across seasons.
Track water as well. A rain gauge and a note of when you irrigated tell you whether mulch or a different watering schedule is saving you effort. Over a few years, the log shows which practices improve soil and reduce inputs, and which ones do not justify the time.
Use the results to plan the next season: which varieties to repeat, where to rotate beds, and how much compost the soil actually needs. Pricing depends on quantity, dates, and delivery, so check the current offer on the Soda Springs Solar Gardens LLC seed potato page before you order. Start small, record what happens, and let the data guide each year's plot.
Frequently Asked Questions
What month is too late to plant potatoes?
In most of the United States, potatoes go into the ground about two to four weeks before the last expected spring frost, once soil has warmed to roughly 45 to 50 degrees Fahrenheit. Planting later shortens the window before summer heat slows tuber formation. Count backward from your first fall frost date using the variety's days to maturity, which is usually 70 to 120 days. If the calculated planting date has passed by more than a few weeks, a fast early variety or a container you can move indoors is the safer choice. Check your local extension office for frost dates in your county.
How many potatoes will 10 lbs of seed potatoes produce?
Yield depends on variety, seed piece size, spacing and growing conditions, but a common rule of thumb for home gardens is about 8 to 10 pounds of harvest for every pound of seed potatoes planted. That means 10 pounds of seed can plausibly return 60 to 100 pounds of tubers under good conditions. Cutting seed into pieces with at least one or two eyes stretches the quantity, though whole small seed tubers often perform more reliably. Track your own weights at harvest to learn what your plot produces, which is one of the most useful measurements for planning future seasons.
Are potatoes easy to grow for beginners?
Potatoes are one of the more forgiving crops for new gardeners because they tolerate a range of soils and need no special equipment. The main requirements are loose soil that drains well, consistent moisture, and protection from frost and pests. Beginners usually struggle most with overwatering, planting too early and letting tubers push out of the soil and turn green. Hilling soil or mulch over the growing stems addresses the last problem, and starting with certified, disease-free seed potatoes reduces the risk of losses from the start.
Will potatoes grow in a 5-gallon grow bag?
Yes. A 5-gallon grow bag can produce a worthwhile harvest of small to medium potatoes when you plant one or two seed pieces, fill the bag with loose, well-drained potting mix and keep it evenly moist. Roll the top edges down as the plants grow, adding mix to cover the stems, so tubers form throughout the bag. Container potatoes dry out faster than ground-planted ones, so check moisture daily in hot weather. Harvest is simple: tip the bag over a tarp and collect the tubers, which also makes it easy to reuse the soil for other crops.
Comments