

How to Cook Fingerling Potatoes for Crispy Results
Last Updated: November 4, 2026
Quick Summary
To cook fingerling potatoes for crispy results, heat the oven to 425°F, halve them lengthwise, toss with oil and salt, and roast cut side down for 25 to 30 minutes. Dry the potatoes completely first, since wet potatoes steam instead of browning. They are done when the cut sides are golden and a knife slides in easily.
Roasting at 400°F takes about 30 to 35 minutes for halved fingerlings, roughly 5 minutes longer than at 425°F.
Parboil halved potatoes in well-salted water for 8 to 10 minutes before pan-roasting in a cast iron skillet.
Air fry halved potatoes at 400°F for 12 to 15 minutes, shaking the basket halfway through.
Keep leftovers in a sealed container in the fridge for up to 4 days, then reheat at 400°F for 8 to 10 minutes.
Small potatoes under about 2 centimeters across can roast whole, while larger ones should be halved lengthwise.
Table of Contents
How to Cook Fingerling Potatoes in the Oven
Oven roasting is a reliable way to cook fingerling potatoes if you want a crisp shell and a creamy middle.
Here is the short version: heat the oven to 425°F, halve the potatoes lengthwise, toss them in oil and salt, and roast cut side down for 25 to 30 minutes. That is the whole recipe.

Wash, Dry, and Halve the Potatoes
Rinse the potatoes under cold water and scrub off any loose soil with your hands or a soft brush. Then dry them completely with a clean towel. This step matters more than most people think.
Cut each potato in half lengthwise, right through the long axis. Small ones can stay whole if they are under about 2 centimeters across. Try to keep the halves a similar size so they finish cooking at the same time.
Toss With Oil and Seasonings
Put the halved potatoes in a large bowl and add enough olive oil to coat every piece, usually 1 to 2 tablespoons for a standard sheet pan. Sprinkle with kosher salt and black pepper, then toss to coat with your hands or a spoon.
Two common mistakes here: too little oil, which causes sticking and pale potatoes, and too much, which makes them greasy. Aim for a thin, even sheen. Hold the garlic and fresh herbs for now.
Arrange Cut Side Down and Roast
Spread the potatoes in a single layer on a sheet pan, cut side down. The flat cut face is what makes contact with the hot pan, and that contact is where the deep golden crust forms.
Roast at 425°F for 25 to 30 minutes. Start checking around the 20-minute mark. They are done when the cut sides are golden brown and a knife slides into the center with no resistance.
Here is the basic oven method at a glance.
Step | What to do | Time or temperature |
Heat the oven | Set to 425°F | 425°F |
Wash and dry | Rinse, scrub, towel-dry completely | Until dry |
Cut | Halve lengthwise; keep under 2 cm whole | , |
Season | Toss with 1 to 2 tablespoons olive oil, salt, pepper | , |
Arrange | Single layer, cut side down on sheet pan | , |
Roast | Check around the 20-minute mark | 25 to 30 minutes |
Doneness | Golden cut sides; knife slides in easily | , |
How to Cook Fingerling Potatoes on the Stove
Pan-roasting on the stove gives you the same crisp-tender result without heating up the whole kitchen, and it is the method to reach for when you only need a skillet's worth.
Here is the method:
Halve the potatoes lengthwise and parboil them in well-salted water for 8 to 10 minutes, until a knife goes in with slight resistance. The water should taste like the sea; this is the only chance to season the interior.
Drain well and let them steam dry in the colander for a minute or two. Shake the colander gently to rough up the cut faces; those tiny scratches become crisp edges.
Heat a cast iron skillet over medium-high heat with a thin layer of olive oil, about 1 tablespoon for a 10-inch pan. The oil should shimmer but not smoke.
Add the potatoes cut side down and leave them alone for 5 to 7 minutes. Resist moving them; the crust forms only after the surface moisture cooks off and the starch browns.
Turn them, add a tablespoon of butter and a sprig of thyme or rosemary, and cook another 5 minutes until golden and crispy. Spoon the foaming butter over the potatoes as they finish.
Parboiling is a step many cooks skip, but it can make a noticeable difference.
Watch out: if the pan is too hot, the butter will scorch before the potatoes are done.
How to Cook Fingerling Potatoes in the Air Fryer
An air fryer can crisp fingerlings quickly and with less oil than oven roasting.
America's Test Kitchen
Toss halved potatoes with a tablespoon of oil, salt, and pepper. Arrange them in a single layer in the basket, cut side up.
A word of caution: air fryer baskets vary a lot in real usable capacity. If your basket is small, cook in two batches rather than piling them up.
Roasted Fingerling Potatoes at 400°F: Time and Doneness Cues
Roasting at 400°F takes about 30 to 35 minutes for halved fingerlings, roughly 5 minutes longer than at 425°F. The lower temperature is more forgiving. It gives the centers more time to turn creamy before the outsides over-brown, which helps if your potatoes are on the larger side.
Use these cues to judge doneness rather than relying on the clock alone:
Color: deep golden brown on the cut face, with blistered, slightly wrinkled skins.
Texture test: a paring knife slides in with no resistance and no grainy pull.
The squeeze test: press one gently with a spoon. It should give slightly, like a baked potato, not collapse.
If the outsides are browning but the centers still feel firm, drop the heat to 375°F and give them another 5 to 10 minutes. If they are cooked through but pale, run the broiler for 1 to 2 minutes. Watch that broiler closely; it can go from golden to charred in under a minute.
How to Get a Crispy Exterior and Tender Center
Crisp outside, creamy inside comes down to four things: dry potatoes, hot pan, space, and patience. The mechanism is simple: surface moisture has to evaporate before the surface can exceed the boiling point and brown, and the interior has to reach tenderness without the exterior burning first. Every tip below serves one of those two goals.
Dry them well. Moisture on the surface has to evaporate before browning can start.
Preheat the pan. A sheet pan that goes into the oven cold slows the browning.
Give them room. A single layer with a little gap between pieces is the goal.
Leave them alone. Resist the urge to stir. Every time you move a potato, you interrupt the browning on that side.
Use these cues to judge doneness rather than relying on the clock alone:
Color: deep golden brown on the cut face, with blistered, slightly wrinkled skins.
Texture test: a paring knife slides in with no resistance and no grainy pull. Resistance means undercooked; a crumbly, dry pull means overcooked.
The squeeze test: press one gently with a spoon. It should give slightly, like a baked potato, not collapse.
Troubleshooting the three common failures:
Undercooked centers, browned outsides: drop the heat to 375°F, cover the pan loosely with foil, and give them another 5 to 10 minutes. The foil traps steam to finish the interior while the lower heat protects the crust.
Soggy or pale results: the pan was crowded or the potatoes were wet. Spread them onto a second pan, raise the heat to 425°F, and roast another 5 minutes uncovered.
Browning too quickly: move the pan to a lower rack, reduce the heat by 25°F, and tent with foil. If they are cooked through but pale, run the broiler for 1 to 2 minutes; watch closely, because it can go from golden to charred in under a minute.
A note on oil: enough to coat every piece thinly, usually 1 to 2 tablespoons per pan, is the sweet spot. Too little and the surface dries before it browns; too much and the potatoes fry rather than roast, turning greasy.
Flavor Variations Beyond Garlic and Rosemary
Garlic and rosemary is the classic pairing for a reason, but fingerlings take to a much wider range of seasonings. Here are five combinations worth trying:
Smoked paprika and cumin: warm and earthy, excellent alongside grilled meat.
Lemon zest, thyme, and a finish of fresh lemon juice: bright and clean, good with fish.
Dijon mustard whisked into the oil before tossing: tangy, with a subtle crust.
If you want to cook with several varieties at once to compare flavors, you can build a sampler of organic seed potato varieties and grow your own mix for the pan.
Make-Ahead, Storage, and Reheating Tips
Roasted fingerlings are best straight from the oven, but they hold up well if you plan ahead.
Make-ahead: Parboil and drain the potatoes up to a day in advance.
Storage: Keep leftovers in a sealed container in the fridge for up to 4 days. Let them cool first; trapping steam in the container makes them soggy.
Reheating: The oven or air fryer brings them back best.
Watch out: reheating at high heat with no oil can dry the potatoes out. Toss them with a teaspoon of oil first.
Choosing and Preparing Fingerling Potatoes of Different Sizes
Fingerling potatoes rarely arrive in a uniform size, and that is fine as long as you prep them with size in mind.
Small potatoes can roast whole. Larger ones should be halved lengthwise. Anything much bigger than your thumb should be quartered so every piece finishes at the same time.
Look for firm, smooth-skinned potatoes with no soft spots, sprouts, or green patches.
If you want to cook with named varieties, French Fingerling and Rose Finn Apple are two of the most popular, and both roast beautifully. You can order a small sample of French Fingerling seed potatoes to try growing your own, browse the full list of specialty varieties we offer, or buy Austrian Crescent seed potatoes if you want a reliable fingerling for the garden. We answer that in our guide to growing fingerlings at home.
For guidance on safe handling and storage of fresh produce, the USDA food safety guidance is a useful reference. Home gardeners can also check the home food gardening resources from USDA for practical growing and handling tips. And if you are watching your salt intake, the Dietary Guidelines for Americans offers clear targets for sodium.
Frequently Asked Questions
Should you boil fingerling potatoes before roasting?
You can skip boiling for most fingerling varieties because they are small and roast through in 25 to 30 minutes at 425°F. Parboiling for 5 to 7 minutes helps only when you want an extra-crispy exterior, since it roughens the surface and releases starch. If you parboil, drain well and let the potatoes steam dry for a few minutes before tossing in oil. For weeknight cooking, halving and roasting directly on a sheet pan is faster and delivers tender centers with golden edges.
Do you need to peel fingerling potatoes?
No. Fingerling skins are thin and turn crisp in the oven, so leave them on. The skin also holds the potato together when you halve it and helps it keep its shape on the pan. Just scrub under cold water, dry thoroughly with a towel, and cut out any dark spots. Wet potatoes steam instead of browning, so drying is the step that matters more than peeling.
How long do you cook fingerling potatoes at 400°F?
Halved fingerling potatoes take about 30 to 35 minutes at 400°F, while whole small ones need 35 to 40 minutes. Spread them in a single layer with space between pieces so they brown rather than steam. Flip once around the 20-minute mark. They are done when a knife slides in with no resistance and the cut sides are golden brown. If they need more color, run the broiler for 1 to 2 minutes and watch closely so the garlic does not burn.
What should you serve with fingerling potatoes?
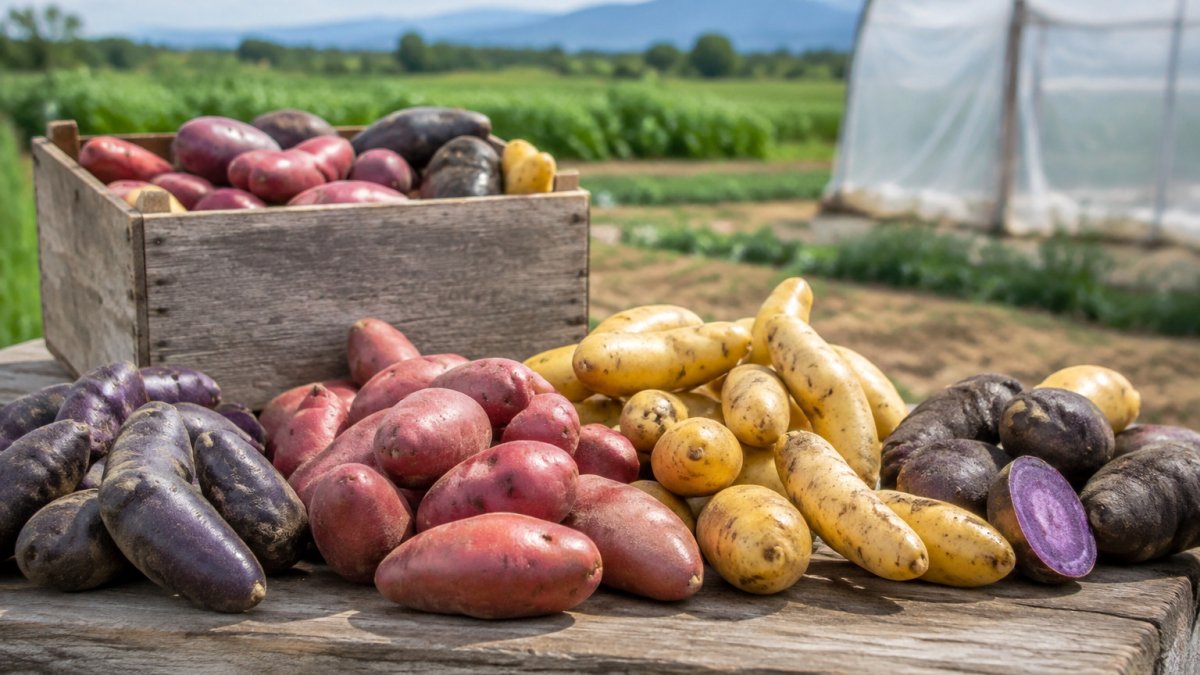
Roasted fingerling potatoes pair well with roast chicken, grilled steak, baked salmon, or a simple pan-seared pork chop. For a lighter plate, serve them warm over arugula with a mustard vinaigrette, or alongside a fried egg for breakfast. A dollop of sour cream or a sprinkle of flaky salt and parsley finishes them. If you grow your own specialty varieties, the color contrast of purple, red, and yellow fingerlings makes the side dish the centerpiece.
Cooking fingerling potatoes well comes down to a few simple habits: dry them, give them space, and use enough heat. The rest is seasoning. At Soda Springs Solar Gardens LLC, we grow certified organic, early generation seed potatoes in rare fingerling and colored varieties, selected for strong growth and clean stock. If you want to cook fingerlings you grew yourself, browse our single-drop seed potatoes and specialty varieties, and get started with Soda Springs Solar Gardens LLC this season.
Comments