

Pathogen-Free Seed Potatoes for Home Gardens: A Grower's Guide
Table of Contents
Why Pathogen-Free Seed Potatoes Matter for Home Growers
Understanding Certified Disease-Free Seed Potatoes
What Certification Actually Means
How Pathogen Testing Works
What 'Disease-Free' Does and Does Not Guarantee
Reading a Certification Label
Choosing the Right Seed Potatoes for Your Garden
Evaluating Tuber Quality and Firmness
Recognizing Disease Symptoms Before Planting
How to Pre-Sprout Seed Potatoes Before Planting
Grocery Store Potatoes for Planting: Why It's Risky
Chemical Treatments and Growth Inhibitors
Disease Risk and Crop Loss
Saving Potatoes for Seed: A Complete Workflow
Selecting and Storing Seed Stock
Preventing Disease Carryover Year to Year
From Planting to Harvest: Growing Pathogen-Free Potatoes
Regional Planting Dates and Soil Preparation
Managing Potato Blight and Common Diseases
Sourcing, Shipping, and Storage Best Practices
Evaluating a Seed-Potato Supplier
Inspecting Tubers on Arrival
Storing Seed Potatoes Before Planting
Chitting and Pre-Planting Handling
Frequently Asked Questions
Last Updated: October 21, 2026
Why Pathogen-Free Seed Potatoes Matter for Home Growers
Growing potatoes at home starts with one decision: what seed stock you'll plant. Pathogen-free seed potatoes are the foundation of a successful crop, in a backyard garden or a patio bucket.
Many home gardeners don't realize the difference between certified disease-free seed potatoes and grocery store potatoes, which may harbor invisible pathogens that destroy your entire harvest.
At Soda Springs Solar Gardens LLC, we specialize in pathogen-free seed potatoes.
Understanding Certified Disease-Free Seed Potatoes
Certified disease-free seed potatoes are tubers grown, inspected, and tested under a formal seed-potato certification program to limit harmful pathogens. Certification means an independent authority verified the seed met specific health standards before it reached you. It does not mean the tubers are sterile, nor does it guarantee a disease-free garden, understanding what the label actually certifies is the difference between trusting a claim and evaluating it.
What Certification Actually Means
Certification is not a marketing term.
The core mechanism is generation tracking. Certified seed is produced in a limited-generation system that starts with disease-tested nuclear stock and multiplies it through a small number of field generations.
Certification also involves field inspections during the growing season.
How Pathogen Testing Works
Testing combines visual inspection with laboratory analysis. Visual inspection happens in the field and at packing facilities, where inspectors examine tubers for soft rot, scab, and other visible defects and look at plants for symptoms of viruses and wilts.
Laboratory testing goes deeper. The most common methods are:
ELISA (enzyme-linked immunosorbent assay), a plate-based test that detects virus proteins and is widely used for potato virus Y, potato virus X, potato leafroll virus, and potato virus S. It is fast and inexpensive but can miss very low virus concentrations.
PCR and real-time PCR, molecular tests that detect viral or bacterial DNA/RNA and are more sensitive than ELISA. These are increasingly used for high-generation nuclear stock and for confirming suspect lots.
Bioassays, indicator plants or tissue culture are used to reveal latent viruses that serological and molecular tests may miss in dormant tubers.
A certified lot is not tested tuber by tuber. Certification relies on statistical sampling: a portion of the lot is tested, and the program's tolerances define how much infection is allowed before the lot fails.
What 'Disease-Free' Does and Does Not Guarantee
A certified disease-free label is a statement about the lot at the time it was inspected and tested, under that state program's tolerances, not a guarantee that every tuber is pathogen-free.
What certification generally does:
Limits the presence of regulated viruses and bacterial pathogens to a defined tolerance
Documents the generation of the seed so you know how far it is from tested mother stock
Requires field inspection and, depending on the program, laboratory testing
What certification does not do:
Eliminate every pathogen, tolerances allow low levels of some viruses
Protect against infection after delivery, including storage rot, cross-contamination, or soilborne disease in your garden
Guarantee varietal purity beyond the program's own field and laboratory checks
Pro Tip When comparing seed-potato listings, look for the state certification program, the generation designation, and the date the lot was inspected. A listing that says only "certified" without a program or generation is harder to evaluate than one that names both.
Reading a Certification Label
Most certified seed-potato lots ship with a tag listing the variety, state program, generation, lot number, and inspection or test date. The lot number is the key field: it lets the supplier and certifying agency trace the seed back to its field. If a supplier cannot tell you the generation and the certifying state, treat the "disease-free" claim as marketing rather than certification.
Key Takeaway Certification is a generation-tracked, inspected, and sampled system, not a guarantee of sterility. The generation number and the certifying state program are the two details that tell you how much protection you are actually buying.
Choosing the Right Seed Potatoes for Your Garden
Selecting pathogen-free seed potatoes requires knowing what to look for and where to buy. Not all seed potatoes are equal, even among certified stock: variety, tuber size, and sprouting status all affect your success.
Evaluating Tuber Quality and Firmness
Start by examining the tubers. Healthy seed potatoes are firm and solid, dense in your hand rather than soft or mushy.
Size matters for home gardens. Seed potatoes typically range from one to two ounces, ideal for small-scale planting. Larger tubers can be cut into pieces, but certified seed is usually sold whole to preserve pathogen-free status.
Recognizing Disease Symptoms Before Planting

Inspect your seed potatoes before planting, your last chance to catch problems. Reject any tuber showing these symptoms:
Soft spots or mushy areas indicate rot or bacterial infection
Dark or sunken lesions suggest late blight or other fungal diseases
Excessive sprouting before planting signals storage problems
If you're buying from a reputable supplier like Soda Springs Solar Gardens LLC, these problems should be rare. But inspecting your seed before planting takes seconds and can save your entire crop.
How to Pre-Sprout Seed Potatoes Before Planting
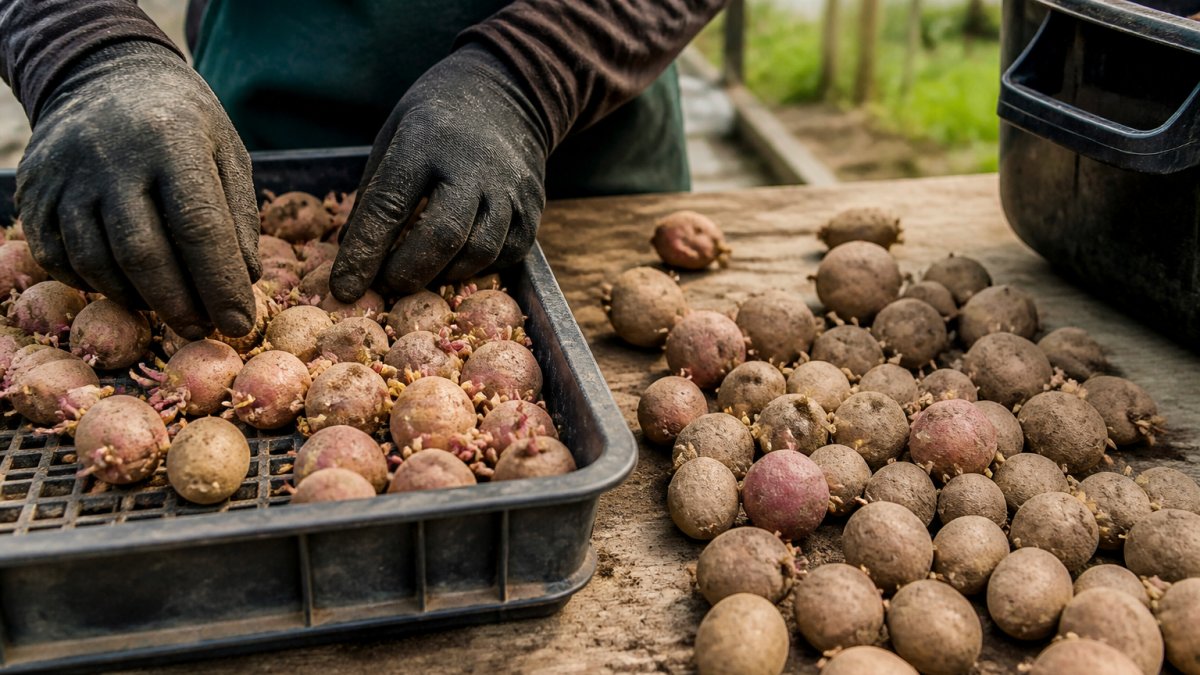
Pre-sprouting, also called chitting, gives your seed potatoes a head start. Place them in a cool, bright indoor location such as a windowsill, avoiding direct, intense heat.
Pre-sprouting typically takes two to three weeks. Once sprouts are about half an inch long, your seed potatoes are ready to plant, primed to grow immediately after going into the soil, which can accelerate your harvest by one to two weeks.
Grocery Store Potatoes for Planting: Why It's Risky
Many home gardeners skip certified seed and plant grocery store potatoes instead. This seems economical until your crop fails.
Chemical Treatments and Growth Inhibitors
Grocery store potatoes are treated with growth inhibitors to prevent sprouting during storage and shipping. These chemicals are safe for eating but designed to stop germination, so a treated potato may not sprout at all, or its sprouts may be weak and slow to establish.
Disease Risk and Crop Loss
Grocery store potatoes come from commercial farms that prioritize yield over disease prevention. They're not tested for pathogens or inspected for certification, simply harvested, packed, and shipped.
The financial loss is real. Certified pathogen-free seed potatoes cost more upfront, but they deliver reliable results that justify the investment.
Saving Potatoes for Seed: A Complete Workflow
Growing your own seed potatoes is possible, but it requires discipline and knowledge. Many home gardeners attempt this and fail because they don't understand the disease prevention protocols.
Selecting and Storing Seed Stock
Choose your best plants for seed production: potatoes from vigorous plants that grew well and produced abundant tubers are more likely to produce healthy seed next season. Harvest seed potatoes separately from eating potatoes and store them in a cool, dark place with good air circulation at 35 to 45 degrees Fahrenheit, a basement corner or unheated garage works well.
Preventing Disease Carryover Year to Year
Disease prevention is where most home seed savers fail. Pathogens survive in soil and on storage containers, so planting in the same location year after year accumulates disease pressure. Rotate your planting location and don't plant potatoes in the same bed two years in a row, which breaks the disease cycle for many common pathogens.
From Planting to Harvest: Growing Pathogen-Free Potatoes
Once you've secured quality pathogen-free seed potatoes, success depends on proper growing practices and disease management.
Regional Planting Dates and Soil Preparation
Planting dates vary by region. In cooler areas, plant in spring after the last frost date; in warmer regions, plant in late winter or early spring for a spring harvest, then again in mid-summer for a fall crop. Prepare loose, well-draining soil rich in organic matter by mixing in compost or aged manure, and avoid soil where potatoes grew the previous year to reduce disease pressure from soilborne pathogens.
Managing Potato Blight and Common Diseases
Potato blight is the most destructive disease, spreading rapidly in cool, wet conditions. If you see dark, water-soaked spots on leaves or stems, act immediately: remove affected leaves and stems, improve air circulation by pruning lower foliage, and avoid overhead watering, which spreads fungal spores, water at soil level instead.
Sourcing, Shipping, and Storage Best Practices
Where you buy your pathogen-free seed potatoes matters, but so does what you do with them after they arrive. A certified lot can be compromised by poor shipping, careless handling, or bad storage.
Evaluating a Seed-Potato Supplier
Use the same checklist whether you are buying from a specialty grower, a garden center, or a mail-order catalog:
Certification details, Can the supplier name the state seed-potato program, the generation, and the inspection date for the lot? A supplier who can answer these questions is selling certified seed; one who cannot is selling potatoes with a health claim.
Generation transparency, Ask whether the lot is Generation 1, 2, 3, or higher. Lower generations cost more but carry tighter tolerances and are the better choice if you plan to save seed.
Variety and source, Ask where the seed was grown. Seed produced in a region with high virus pressure is more likely to carry latent infection even when it passes inspection.
Watch Out A "disease-free" claim without a certifying state program, generation, and lot number is not certification. It is a marketing phrase. Treat it accordingly.
Inspecting Tubers on Arrival
Open the box the day it arrives. Shipping stress shows up quickly, and a problem caught in the first 24 hours is one the supplier can usually resolve. Check for:
Firmness, Tubers should feel dense and solid. Soft or mushy areas indicate rot that may have started before shipping or during transit.
Skin condition, Look for cuts, bruises, and dark sunken lesions. Small surface blemishes are normal; deep cuts and spreading lesions are not.
Sprout status, Small, sturdy sprouts (a quarter inch or less) are fine and even desirable. Long, pale, spindly sprouts mean the tubers were stored warm or shipped too late in the season.
If more than a small fraction of the lot is soft, rotting, or mislabeled, contact the supplier before planting. Photograph the tubers and the label; most reputable suppliers will replace a bad lot.
Storing Seed Potatoes Before Planting
Seed potatoes need cool, dark, ventilated storage to stay dormant and disease-free until planting.
Temperature, Aim for roughly 38 to 45 degrees Fahrenheit before chitting. This slows sprouting without freezing the tuber; avoid storage above 50 degrees Fahrenheit for long periods, which encourages premature sprouting and shriveling.
Light, Keep seed in the dark until you are ready to chit. Light exposure causes greening and can trigger early sprout growth.
Ventilation, Store in a single layer or in breathable crates or mesh bags. Do not seal seed in plastic; trapped moisture drives rot.
Chitting and Pre-Planting Handling
When ready to pre-sprout, move seed to a cool, bright location and follow the chitting guidance above. Handle tubers gently during chitting and planting; bruises are entry points for rot bacteria. Do not wash seed potatoes before planting, washing removes the protective skin and spreads pathogens between tubers.
Key Takeaway Sourcing is only half the job. Evaluate the supplier on certification details and generation, inspect every delivery within a day, and store seed cool, dark, and ventilated with weekly checks. Those habits protect the investment you made in certified seed.
Frequently Asked Questions
What does pathogen-free seed potato mean?
Pathogen-free seed potatoes are tubers tested and certified to be free of harmful viruses, bacteria, and fungi that cause potato diseases. These potatoes are grown under strict inspection protocols and come with documentation proving they've passed certification testing. This ensures your crop starts disease-free, leading to healthier plants and better yields compared to untreated seed stock.
Why should home gardeners use certified seed potatoes instead of grocery store potatoes?
Grocery store potatoes are treated with growth inhibitors to prevent sprouting and may carry hidden pathogens. Certified seed potatoes are inspected, tested, and grown specifically for planting. They produce vigorous, disease-free plants. Home gardeners using certified seed see more reliable crop vigor and fewer disease problems in their harvest.
Can you save potatoes from your harvest to plant next year?
Yes, but with caution. Save the healthiest, firmest tubers from disease-free plants, store them in a cool dark place, and inspect them before planting next year. However, saved seed potatoes can accumulate pathogens over generations. Many home gardeners rotate between their saved seed and certified disease-free stock every few years to prevent disease buildup and maintain crop quality.
How do you prepare seed potatoes before planting?
Pre-sprouting seed potatoes indoors 2-3 weeks before planting gives them a head start. Place them in a cool, bright location (50-60°F) with indirect light until small sprouts form. This accelerates germination and helps you spot any diseased tubers before they go in the ground. Cut larger potatoes into 2-ounce pieces with at least 2 eyes per piece, let the cut sides dry for 1-2 days, then plant.
PURCHASE SEED POTATOES
Comments